Mobile App Development in PicoLisp - IV: Using the PilBox REPL

In the last post, we have downloaded and checked the source code of some demo applications. Now let's see what we can do with the other built-in tool: the REPL.
About the PilBox REPL
The PilBox REPL provides us with a PicoLisp interpreter and a very simple shell on our phone. However, typing on the phone can be quite tedious, and it is not adequate for complex operations. A little teaser: In the next post, we will see how to get a proper PilBox shell from your PC.
But for now, let's try to understand how the built-in shell works.
Basic functions
When you open the REPL page (by clicking on the PicoLisp icon in the top left side), you can see a big white field and a small input field below.
Before the input field comes the current namespace, which is currently android. This means that the interpreter first searches the android namespace for a given function and after that the standard 'pico' namespace.

We have two ways to interact with it:
- either we type standard "PicoLisp" code,
- or we can use invoke shell commands, if we prefix them with
!.
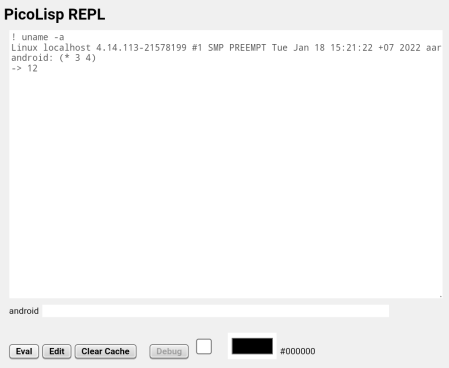
In the example above, you can see that I checked the current system with the shell command ! uname -a, and executed the PicoLisp code (* 3 4).
In other words, with this we have a simple shell on our current phone. whoami returns the PilBox user, which in my case is u0_a384, and ls -la shows us all the files in the current directory. Here you can see what the "sandbox" concept in Android means: all files in the folder belong to user u0_a384 and no other user (process) has access to it.
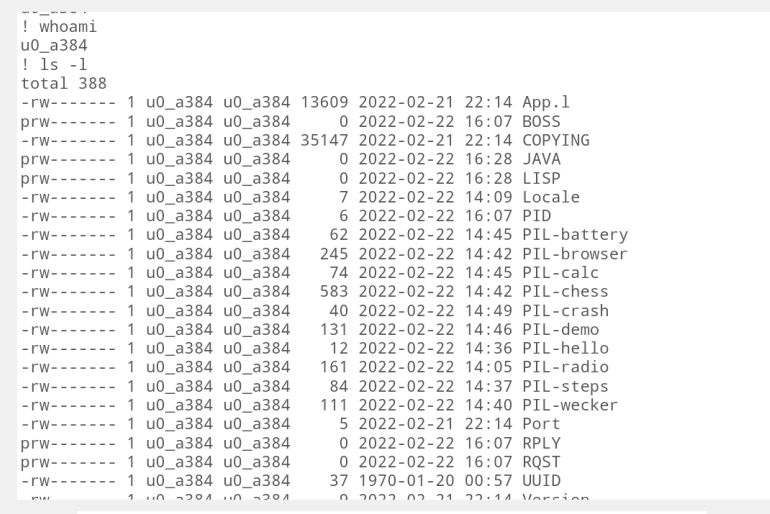
Of course it also means that we cannot call commands that require higher privileges: for example (! ifconfig) returns No file /proc/net/dev: Permission denied.
Loading files
Next to the "eval" button, you can find an "edit" button. This button takes the current text in the input field and opens a file of the corresponding name. If no such file exists, a new one is created (but it will only be saved after we have typed something).
Let's try: We could open the main file (App.l) from the "hello"-demo and modify the code. It can be found in the hello/ folder:
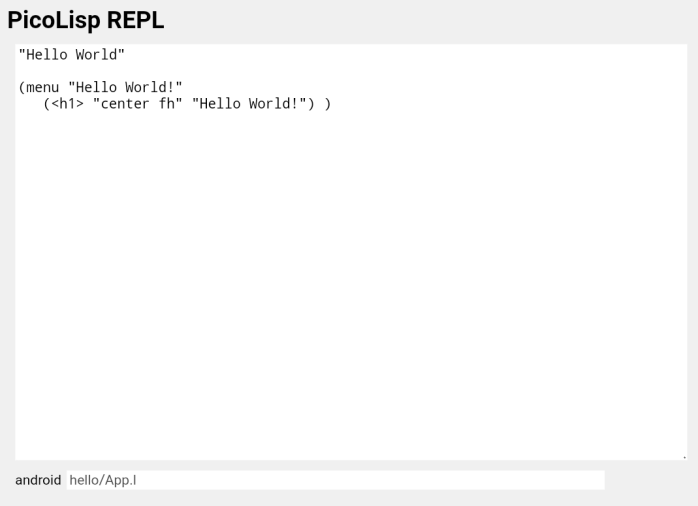
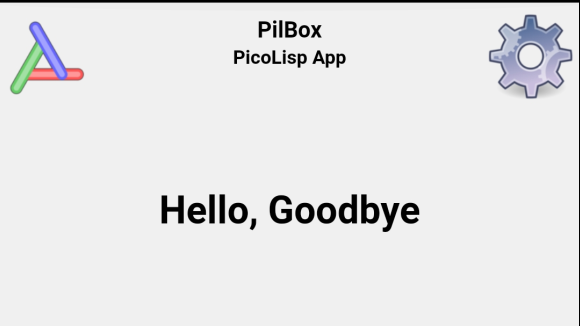
Let's tap into the field and change "Hello World" to "Hello, Goodbye". When we click on the top left icon and then on our "Hello" app, we will see that it has changed:
Check the logs
The list of files, viewed with ! ls -l, also shows two interesting files: log and log-. Both of them are log files; while log contains the data of the current process, log- contains the data of the previous process. Accordingly, it can contain important information if your app suddenly stops working.
You can check the content of the files by typing log and press the EDIT-button, or even easier, type ! cat log / ! cat log-.
"Clear Cache" and "Debug"
There are two more buttons: "Clear Cache" and "Debug". When you press "clear cache", you usually won't see much, unless you changed for example the CSS-file: In this case clearing the cache will automatically load the new CSS file (otherwise it might take up to 24 hours).
If you tap the debug-button, you will enter the "debug" mode. This loads all necessary files, and after that the button gets disabled and can't be tapped again. Debug mode is enabled automatically if we connect the smartphone to the computer via a pseudo-tty, as we will see in the next post.
Sources
- www.software-lab.de/pilBox.apk
Comments
Join the discussionHi Mia, just a suggestion. Here (! ls -l) parentheses might be removed. Just highlighting ! ls -l is better I feel. :)