
Mobile App Development in PicoLisp - V: Getting a Remote Shell to your PC

In the last post, we have checked out the REPL. If you have used it, you might agree that it is not really adequate to write complex program. Typing on the phone is not easy, the window is too small and we cannot properly test the code.
Today we will see how we can get a shell on our smartphone with help of PilBox.
How it works
We establish a pseudoterminal (PTY) between our smartphone and our desktop computer or any other device you plan to use. The PTY is established between the ports of the two process and enables asynchronous, bidirectional communication.
In order for this to work, both devices don't have to be physically connected, but they need to be in the same network. It will not work from mobile network, so as first step, connect both devices (phone and PC) to the same WiFi.
Identify your phone's IP address
As first step, we need to identify our phone's IP address. If we had full privileges on the PilBox REPL, we could call ipconfig or ip addr or similar commands to get the IP address, but unfortunately these are blocked. One easy way to find the local IP address is by checking the list of connected devices in your router.
Now, as we learned before, the PTY needs two open ports. In other words, our PilBox is opening a port on your smartphone. You can confirm that for example with the command line tool nmap. The output will probably look something like this:
$ sudo nmap <smartphone-local-ip>
Starting Nmap 7.80 ( https://nmap.org ) at 2022-02-22 17:46 CET
Nmap scan report for <your-smartphone>
Host is up (0.017s latency).
Not shown: 997 closed ports
PORT     STATE SERVICE
8081/tcp open  blackice-icecap

Nmap done: 1 IP address (1 host up) scanned in 21.16 seconds
There is one open port, 8081. (There might also be more depending on what other apps you have installed.) I think the "blackice-icecap" service name is just a wild guess from nmap because PilBox is not in their database yet, so we can ignore that.
Change the port (if needed)
If the port 8081 is clashing with some other apps, you also have the possibility to adjust the port. For this, simply access the file Port (located in the app's home directory) in the REPL by typing "Port" and press "Edit".
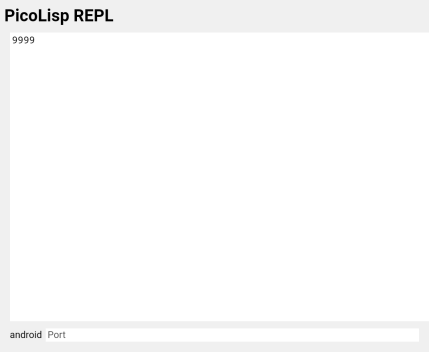
After that restart the PilBox and scan again. Now nmap should show two open ports on 9999:
PORT      STATE SERVICE
9999/tcp  open  abyss
Creating the "secret key"
Next, you need to create a "secret key" file in the home directory of both app and your PC. The content of both files should be the same. The file name is .pty. For example, I created a file with content "testkey" in my home directory on my laptop:
$ cat ~/.pty
testkey
and on my phone:

I encourage you to choose a stronger pass file than "testkey".
If you now restart the PilBox, it will run in debug mode, as can be seen because the debug button in the REPL will be disabled, and if you run nmap again, you would notice a second open port, one digit higher then the existing one (default: 8081 + 8082). These two ports will be used for the communication.
Starting the session
The script to establish the PTY can be found in the bin/pty file of your pil21-installation.
Note: If you have changed the port number from 8081 to another port, you need to modify the port variable in the starting script, too (line 7).
Then we can establish the connection. For example, if your pil21-installation is in your home folder and the local IP address of your phone is 192.168.178.27, it looks like this:
~/pil21/pil @/bin/pty 192.168.178.27
-> NIL
android:
Just like in the smartphone REPL, we get a PicoLisp REPL in the android namespace. This is nice, but I promised you a shell. So type: (call "sh"). Now we are on the phone!
android: (call "sh")
:/data/data/de.software_lab.pilbox/files $ whoami
u0_a384
:/data/data/de.software_lab.pilbox/files $ ls
App.l    PIL-battery  PIL-radio   Version  db           lib.l  steps.rc
BOSS     PIL-browser  PIL-steps   battery  demo         loc    tls
COPYING  PIL-calc     PIL-wecker  bin      favicon.ico  log    wecker
JAVA     PIL-chess    Port        browser  hello        log-
LISP     PIL-crash    RPLY        calc     img          radio
Locale   PIL-demo     RQST        chess    lib          src
PID      PIL-hello    UUID        crash    lib.css      steps
Note: Be aware that the communication between the devices is not encrypted, so don't use this in networks you don't trust.
Editing files
The shell we get is rather limited, you will not be able to use a text editor. It is better to modify source code files from the REPL. There are two ways to do it:
- use Vip, the PicoLisp editor,
- or modify the files on your local machine and use the commands
(pbPut <filename>and(pbGet <filename>)to get and change files.
Using VIP
Let's say we want to check the log files. In this case, call this in the REPL:
: (vi "log")
It will open a vi-like editor (vip) that allows you to modify the file. Likewise, you can use vi for source files and to see function definitions:
: (vi "radio/App.l")
: (vi 'car)
More on Vip can be found in this post.
Using pbPut, pbGet
Two other very useful functions are pbPut and pbGet. Assumingafter you want to edit the string in .pty, you can first get the file to your local machine:
: (pbGet "log")
modify it with your preferred editor, and put it back up:
: (pbPut "log")
Note that you cannot specify the destination folder, so you should start the pty from your local equivalent to the app "home" folder. E.g.: If you want to copy the file myApp/App.l, you need to have a folder myApp both on your local machine and on your smartphone. If it is not available yet, you need to create it:
: (call "mkdir" "myApp")
-> T
: (pbPut "myApp/App.l")
Also, be aware that any exiting files with the same name will be overwritten, which is very convenient for updating source code but can also lead to sad accidents.
Now we're almost ready to write our own apps. The next post will explain how the Java interface can be reached from PicoLisp, and then we will take a look at how PicoLisp apps are structured. This should give us all the knowledge we need to write our own apps.
Sources
- http://software-lab.de/pilBox.apk
- http://picolisp.com