The PicoLisp Canvas library
"This world is but a canvas to our imagination." (Hery David Thoreau)

Up to now we basically only worked with different types of textfields and static elements like images. But that leaves one important field missing: How to create dynamic graphical elements?
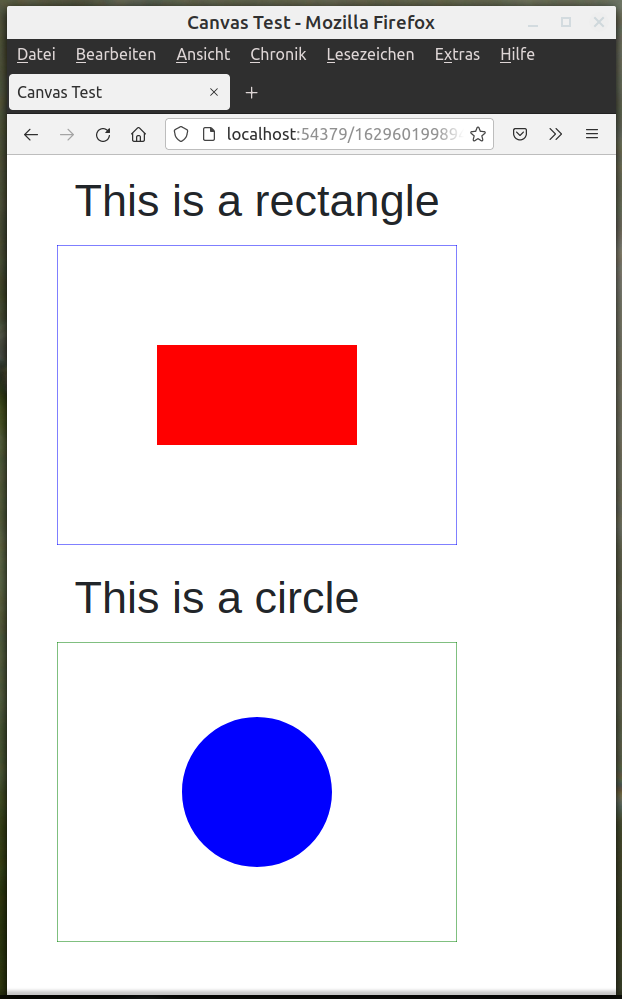
Let's start with some basic examples. In the end, we will have a page with two canvas elements which look like this:
What is "canvas"?
The canvas element is part of HTML5 and allows for dynamic, scriptable rendering of 2D shapes. It is declared by the <canvas> tag and renders to a 300x150 px rectangle shape by default.
Typically it is used together with the JavaScript canvas library. Basically, you need to follow three steps:
- Find the canvas element, for example with
document.getElementById, - You need to define a drawing object with
getContext, - Then you can draw on the canvas.
An example:
<canvas id="myCanvas" width="200" height="200" />

<script>
var canvas = document.getElementById("myCanvas");
var ctx = canvas.getContext("2d");
ctx.moveTo(0, 0);
ctx.lineTo(200, 100);
ctx.stroke();
</script>
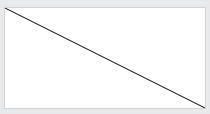
renders a line like this:
Of course you can do more than just draw lines. Here you can find an overview over the most important 2D object methods, like defining styles and colors, transformations, text options and images.
The PicoLisp canvas.l / canvas.js library
In order to use these functions in PicoLisp, you can use the canvas.js and canvas.l library which are in the lib/ folder of the PicoLisp installation.
canvas.l basically contains two functions: a jsDraw function that calls JavaScript functions defined in @lib/canvas.js, and a <canvas> function that creates the canvas.
Let's create a simple example to understand how it works. Let's define the file: First of all, we need to load the libraries, define our canvasTest function which calls (html), and then start the server.
(load "@lib/http.l" "@lib/xhtml.l" "@lib/form.l" "@lib/canvas.l")

(de canvasTest ()
   (and (app) *Port% (redirect (baseHRef) *SesId *Url))
   (action
      (html 0 "Canvas Test" "@lib.css" NIL ) ) )

(server 8080 "!canvasTest")
If we execute it now with $ pil <filename>.l +, we see an empty page on http://localhost:8080. Now let's fill it up.
The <canvas> function
The <canvas> takes four parameters:
- an internal symbol for the canvas ID,
- two numeric values for x and y value,
- and an optional string that is printed if
<canvas>is not supported by the browser.
In order to pass an internal symbol via HTTP to the server, it should start with $ to mark it as internal symbol. The $ itself is part of the encoding, not of the symbol name.
Let's add it to our html function:
(html 0 "Canvas Test" "@lib.css" NIL
   (<canvas> "$testID" 400 300 ) ) ) )
If we visit the page now, it still looks the same. But if we check the source-code (Ctrl-U in Firefox), we see a HTML canvas element inside the <body> tags:
<body>
<canvas id="$testID" width="400" height="300" onmousedown="csMouseDn(this, event)" ontouchstart="csTouchDn(this, event)" onmousemove="csMouseMv(this, event)" ontouchmove="csTouchMv(this, event)" onmouseup="csMouseUp(this)" ontouchend="csTouchEnd(this)" onmouseout="csLeave(this)" ontouchleave="csLeave(this)" class="canvas"></canvas>
</body>
Let's fill it with some shapes.
The drawCanvas function
The canvas content is drawn by defining a drawCanvas function (the name is mandatory). It takes two arguments:
- the ID of the
<canvas>element, - and a numeric "delay" value in milliseconds. For a delay <0, the canvas content is only drawn once, otherwise it is auto-drawn repeatedly.
drawCanvas returns a list of commands that can be built for example with the make function.
For example, let's draw a red rectangle:
(de drawCanvas (Id Dly)
   (make
      (csStrokeStyle "blue")
      (csStrokeRect 0 0 400 300)
      (csFillStyle "red")
      (csFillRect 100 100 200 100) ) )
These functions call the corresponding JavaScript functions strokeStyle, strokeRect, fillStyle and fillRect (JavaScript examples for example on w3schools.com).
Adding onload=drawCanvas
Now we need to tell the browser that the JavaScript for the canvas elements needs to be loaded. Usually we want to execute it directly when the page is loaded. We have two possibilities to do this:
- In the
htmlfunction to insert it directly into the<body>tag:
(html 0 "Page Title" "style.css" '((onload . "drawCanvas('$testID', -1)"))
- In the page body, with help of the
javascriptfunction:
(javascript NIL "onload=drawCanvas('$testID', -1)")
Either way the drawCanvas function from the canvas.jslibrary gets called, and executes the commands listed in the PicoLisp drawCanvas function.
Test
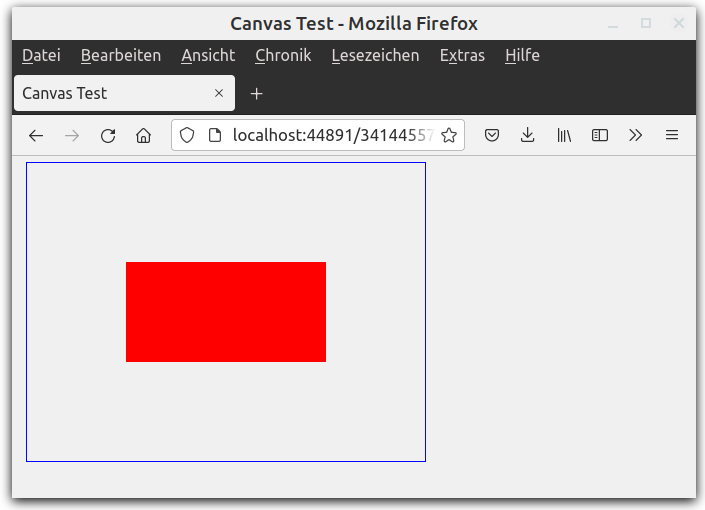
Now let's start the script and point it to http://localhost:8080. It looks like this:
You can find the full source code of this example here.
Working with internal symbols
Up to now, we treated the ID just like a plain string. But actually it is a symbol, which opens many powerful possibilities!
As you might know, objects are internal symbols as well. So how about if we assigned an object to our drawCanvas function? (Spoiler: it works!)
Let's define a class +Rectangle. It should have the properties x, y, dx, dy, stroke and fill, and a method draw>.
(class +Rectangle)
# x y dx dy stroke fill

(dm draw> ()
   (csRect (: x) (: y) (: dx) (: dy))
   (csStrokeStyle (: stroke))
   (csFillStyle (: fill)) )
Then we create an object rectangle:
object 'rectangle '(+Rectangle)
   'x 100
   'y 100
   'dx 200
   'dy 100
   'stroke "blue"
   'fill "red" )
Now we can assign this object to <canvas> and drawCanvas.
(<canvas> "$rectangle" 400 300)
(javascript NIL "onload=drawCanvas('$rectangle', -1)")
The $ is marking "rectangle" as an the internal symbol.
Now we can simplify drawCanvas to:
(de drawCanvas (Id Dly)
   (make
      (draw> Id)
      (csStroke)
      (csFill) ) )
draw> defines position and colors of stroke and fill. Now we only need to call the draw> method of the object, and csStroke and csFill to actually draw it.
You can find the full source code of this example here.
Adding a Second Canvas Element
This approach opens up many possibilities: We can boil very complex examples down to the dynamic behaviour of objects, and we can create several instances of <canvas> on the same page.
Let's say we want to have a circle canvas on its own canvas: Then we only need to define the object.
(class +Circle)
# x y r a b stroke fill

(dm draw> ()
   (csArc (: x) (: y) (: r) (: a) (: b))
   (csStrokeStyle (: stroke))
   (csFillStyle (: fill)) )

(object 'circle '(+Circle)
   'x 200
   'y 150
   'r 75
   'a 0
   'b "6.2832"
   'stroke "green"
   'fill "blue" )
There is no need to redefine the drawCanvas function, because it is all covered by the circle draw> method.
So we are free to include canvas anywhere on our page:
#  Rectangle
(<h1> NIL "This is a rectangle")
(<canvas> "$rectangle" 400 300)
(javascript NIL "onload=drawCanvas('$rectangle', -1)")
# Circle
(<h1> NIL "This is a circle")
(<canvas> "$circle" 400 300)
(javascript NIL "onload=drawCanvas('$circle', -1)") ) ) )
And this is the result:
You can find the full source code of this example here.
Sources
https://www.irasutoya.com/2019/09/blog-post_35.html
https://www.w3schools.com/graphics/canvas_coordinates.asp
https://en.wikipedia.org/wiki/Canvas_element
https://developer.mozilla.org/en-US/docs/Web/API/Canvas_API
Comments
Join the discussionNo comments yet. Be the first to comment.
Web Application Development
In this series, we will show how to create a basic web application in PicoLisp.