Creating a Todo App - 6: Multi-Language Support

A "real" application should not depend on the user's language skills. We need to be able to add and display text in different languages in a flexible way in order to make our app maintainable.
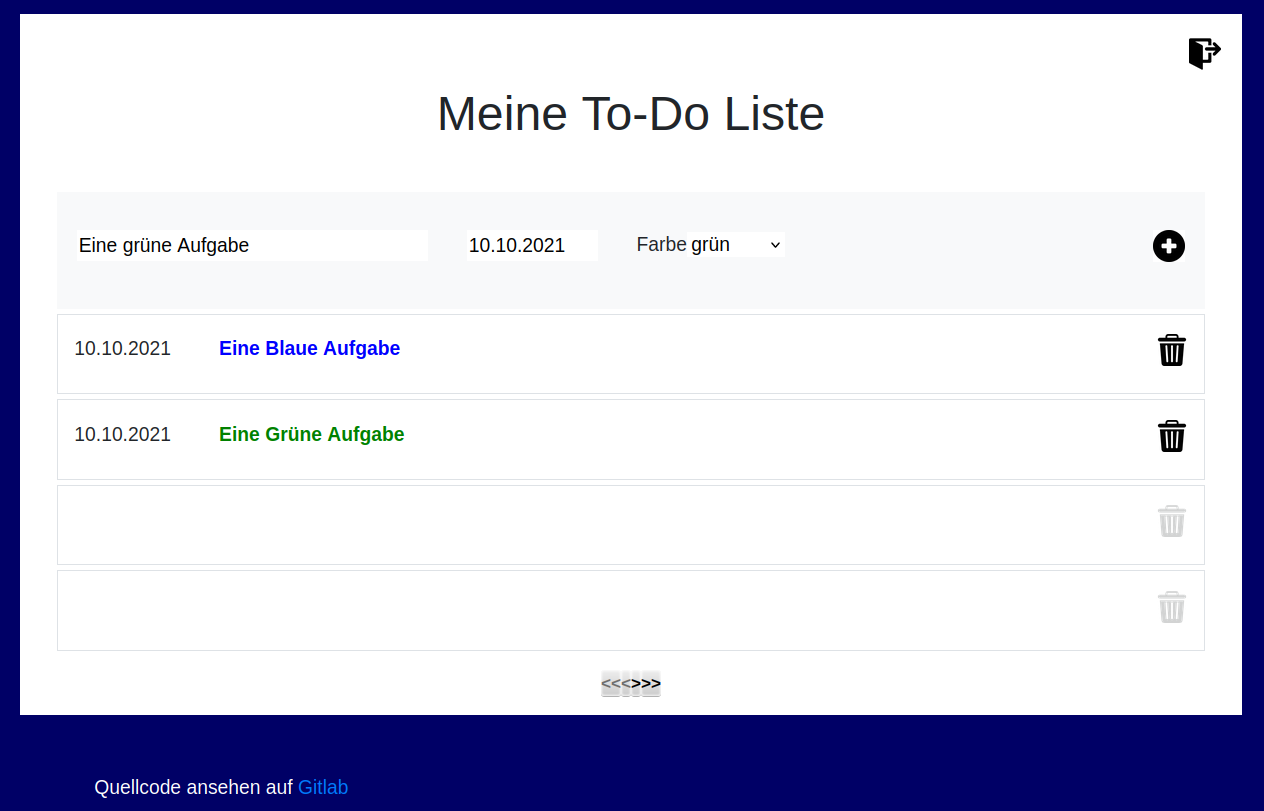
In this post, we will see how we can create a German version of our English "Todo-App" with just a few lines of code.
The locale function
For this purpose we can use the function locale:
(locale 'sym1 'sym2 ['sym ..])Sets the current locale to that given by the country file
sym1and the language filesym2(both located in the "loc/" directory), and optional application-specific directoriessym. The locale influences the language, and numerical, date and other formats.
In order to understand what is meant by that, we will check the contents of the loc folder in the PicoLisp distribution (it's on the same level as the library folder lib):

It contains pairs of language files: DE.l and de for German, JP.l and jp for Japanese, and so on. The "country files" .l defines some global variables, like the time format, separators, weekdays and so on:
# US.l
(setq
   *Sep0 "."
   *Sep3 ","
   *CtryCode "1"
   *NatTrunkPrf '("1")
   *DateFmt '(@M "/" @D "/" @Y)
   *DayFmt '("Monday" "Tuesday" "Wednesday" "Thursday" "Friday" "Saturday" "Sunday")
   *MonFmt '("January" "February" "March" "April" "May" "June" "July" "August" "September" "October" "November" "December") )
while the "language files" contains the translation of specific strings:
# de

"Select" "Auswahl"
"Delete row?" "Zeile löschen?"
"Show" "Anzeigen"
"Bad date format" "Falsches Datums-Format"
"Bad time format" "Falsches Uhrzeit-Format"
"Bad phone number format" "Falsches Telefonnummern-Format"
"male" "männlich"
"female" "weiblich"
Defining the language menu
Now let's give the user a chance to set the language by providing a menu. We use a dropdown menu for this. For example, if the user chooses "Deutsch" (German), we want to call locale with the arguments "De" "de"). This means we need to separate between the displayed dropdown text and the values we want to process.
In order to do this, we can use the prefix class +Map, which takes a list of cons-pairs for a two-way translation. Let's define a list like this:
(de *Locales
   ("English" NIL)
   ("Deutsch" "DE" . "de") )
The CAR of each list item should be displayed in the dropdown menu, while the CDR (for example "DE" . "de") is set as value. The default value should correspond to the global variables *Ctry and *Lang which are NIL if not defined explicitly. In case of NIL, English will be displayed:
(gui '(+Init +Map +TextField)
   (cons *Ctry *Lang)
   *Locales
   (mapcar car *Locales)
   "Language" )
Then we place a button which calls locale with the cons pair as argument, and an optional local folder with the translation:
(gui '(+Button)  "Change"
   '(let V (val> (field -1))
      (locale (car V) (cdr V) "loc/") ) )
This renders an input field like this:
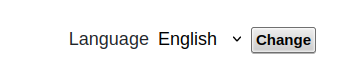
Creating the translation
Next, we create a folder loc with a file de. In this file we store all the strings that we need to translate:
"black" "schwarz"
"blue" "blau"
"Change" "ändern"
"Color: " "Farbe"
...
If you need to modify items dynamically, you can set placeholders with '@1 like for example: "Redo: '@1'" "Wiederherstellen: '@1'".
That's it! If we want to add another language at a later point, we simply add it to our *Locales variable and create another file in loc/.
Setting the read macro
How does PicoLisp "know" which files to translate? There is a pre-defined macro , (comma) for this purpose.
A comma
,will cause the reader to collect the following data item into anidxtree in the global variable*Uni, and to return a previously inserted equal item if present. This makes it possible to create a unique list of references to data which do normally not follow the rules of pointer equality. If the value of*UniisT, the comma read macro mechanism is disabled.
Let's test it in the REPL:
: (off *Uni) #clear
-> NIL
: ,"abc"
-> "abc"
: ,( 1 2 3)
-> (1 2 3)
: *Uni
-> ("abc" NIL (1 2 3))
The function locale then looks up the string stored *Uni and returns the corresponding translation.
: ,"Yes"
-> "Ja"
In other words, all we need to do is to set a "comma" prior to all items we want to see translated, for example headline, button text, errors...:
(gui '(+Button) ',"Change"
...
   (<span> NIL ,"Username: " )
...
      (error ,"Permission denied")
...
With this, we're done - our app is now translated!
Setting the colors right
There is only one small last thing. You might remember that we directly mapped the color names to CSS classes previously. This will not work with the translated version anymore. So let's repeat our trick with +Map and separate displayed text and value:
# Styles
(de *StyleColors
   (,"black" . "black")
   (,"red" . "red")
   (,"green" . "green")
   (,"blue" . "blue")
   (,"yellow" . "yellow"))
We display the CAR, which is automatically translated due to the read-macro, and store the CDR in the database:
(gui '(+Map +TextField)
   *StyleColors
      (mapcar car *StyleColors)) )
Now we have our app completely translated into German. You can find the source code here.
In the next post we will enable a little API to modify our database items.
Sources
https://software-lab.de/doc/form/form.html
https://software-lab.de/doc/app.html
https://software-lab.de/doc/ref.html