# Web Apps: An Animation
# [Task](https://rosettacode.org/wiki/Animation)
> Create a window containing the string "Hello World! " (the trailing space is significant).
> Make the text appear to be rotating right by periodically removing one letter from the end of the string and attaching it to the front. When the user clicks on the (windowed) text, it should reverse its direction.
This will be the result:
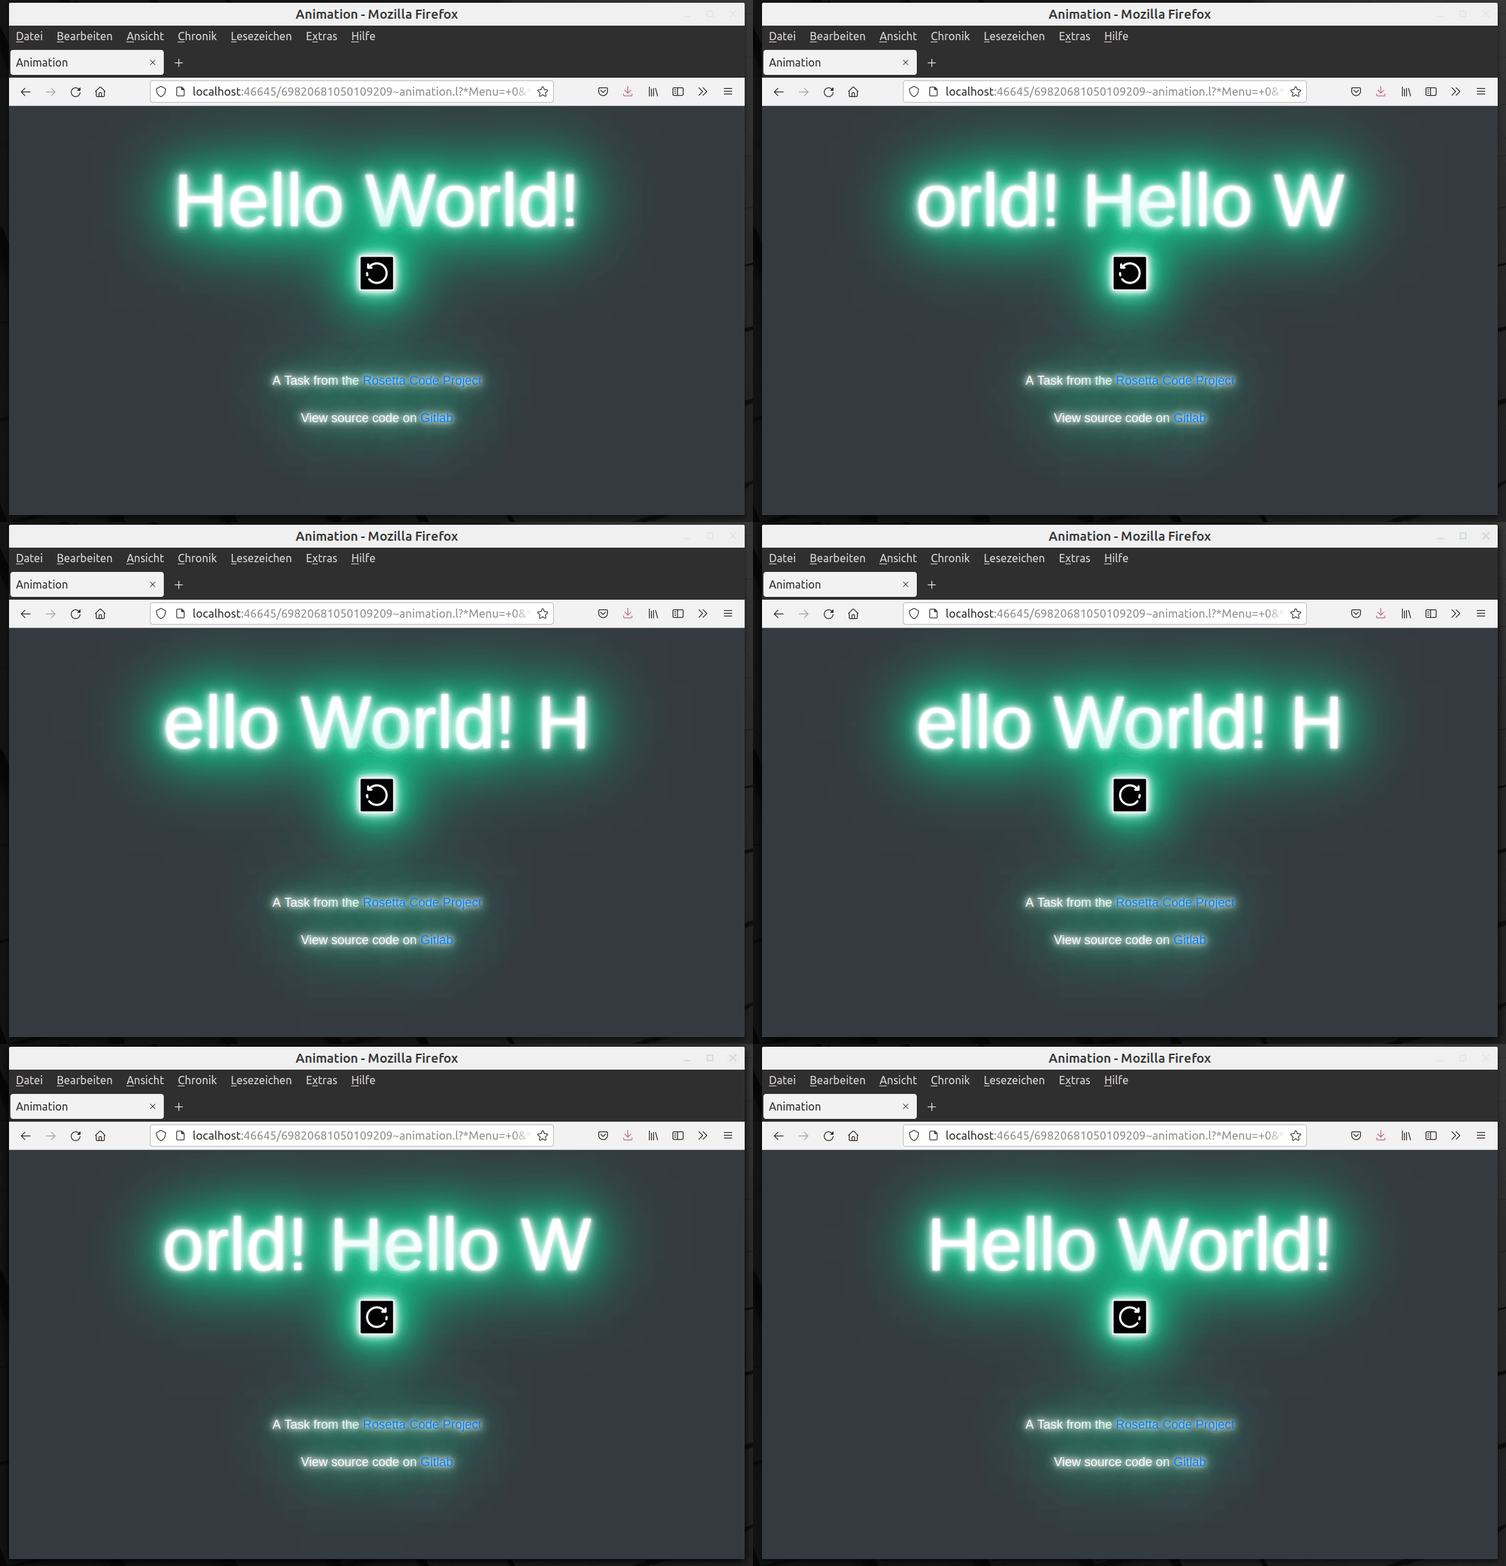
Yes, a **marvolous flickering, blinking, neon-colored banner straight from the early 2000's**!
[Click here for the hosted version.](http://picolisp.com/blog/src/animation.l)
-----------------------------
First we need to understand how we can create some dynamic refresh of the page, i. e. **executing a function periodically** without "clicking" a button. For this purpose, we can use the ``+Click`` and ``+Auto`` prefix classes.
### The ``+Click`` and ``+Auto`` prefix classes
These two classes are usually used together. ``+Click`` is used to "click a button" after a certain amount of time has passed (in milli seconds). ``+Auto`` is a prefix class that automatically presses a button periodically; when called with 'This', it presses itself.
When we check the dependency tree of ``+Auto``, we can see that it inherits from the ``+JS`` class:
```
: (dep '+Auto)
+JS
+Auto
```
-----------------------------------
Let's test a minimal example of a ``+Click +Auto``-button in a file called ``click-button.l``:
```
(app)
(action (html 0 "Animation" "@lib.css" NIL
(form NIL
(gui '(+Click +Auto +Button) 500 'This 1000 "Start") ) ) )
```
Now we start the server with ``$ pil @lib/http.l @lib/xhtml.l @lib/form.l --server 8080 +`` and point or browser to http://localhost:8080/click-button.l. We should see a lonely little button at the top left of our browser window.

What happens when we click this button? Let's open the developer tools of the browser (``F12`` in Firefox) and click on the network analysis tab.
--------------------
### Analyzing the network traffic
After clicking the button, this is what we see:

1. In the first line, we can see a ``POST`` request that redirects the page as response (status: 303). This means that a new **session** is created (more about PicoLisp sessions[here](https://picolisp-blog.hashnode.dev/web-application-development-in-picolisp-creating-html-forms-part-2)).
2. Then we see four ``GET`` requests:
- the actual web page
- the css file
- a JavaScript file called **form.js**
- the browser icon.
3. Then there is one ``POST`` requests per second, initiated by ``form.js``.
From the class definitions of ``+Click`` and ``+Auto``, we know that the first ``POST`` is initiated by the ``+Click`` class, and all the rest by ``+Auto``. Since ``+Auto`` is inheriting from ``+JS``, it is reloading the page only on front-end side using JavaScript (if enabled).
--------------
### The ``form.js`` library
Let's take a few moments to understand what is happening here. If you click on "Initiator" in the network tab, you can see which lines in ``form.js`` are actually calling the page reload:

We are having an ``onsubmit`` call from ``the click-button.l`` on the webpage, which calls ``doPost`` from ``form.js`` and then ``post`` from ``form.js``.
Clicking on any of these lines opens the debugger tab at the relevant file position.

If you follow the code, you can see that there is not much happening - just the page gets reloaded with the updated form content. (In our example, there is no form content though except for the submit button).
--------------------
### Creating the animation start button
Now let's use our new knowledge. With this line of code:
```
(gui '(+Click +Auto +Button) 500 'This 1000 "Start")
```
we get a button which is labelled "Start". When we click it, we submit the form and start a session (if there isn't any yet). This is happening immediately after clicking it.
Then, 500 ms seconds later, we see the first ``form.js`` post initiated by ``+Auto``, followed by periodically generated POST every 1000 ms.
----------------
**Why is this useful for animations?**
This functionality allows us to update **all elements of the ``+gui`` class on the front-end side without reloading the full page from the server**. This avoids the flickering and the response is much faster and smoother.
----------------------
Now let's create the actual content that should be updated.
### Creating the "Hello World"-Element
Let's define a global variable ``*Str``:
```
(setq *Str "Hello World! ")
```
and set it as textfield element. We use the prefix-class ``+View`` to specify the content and call ``+TextField`` without any further arguments, which results in a simple text field without input:
```
(gui '(+View +TextField) '*Str)
```
--------------------
### Rotating the string with ``rot``
The text should rotate "left to right", like this:
- "Hello World! "
- " Hello World!"
- "! Hello World"
- ...
How can we do this?
As you might now, [PicoLisp has many powerful list functions](https://picolisp-blog.hashnode.dev/60-picolisp-functions-you-should-know-6-lists-and-strings). For example, there is a built-in function called ``rot`` that rotates the element by right shift. It takes an optional ``cnt`` argument to rotate more than one element. The ``rot`` function is **destructive**, which means that the original list is modified.
However, what we currently have is only a string. As first step, we need to create a list from our string using ``chop``. Open the REPL and test it (``$ pil +``):
```
: (setq *Str (chop "Hello World! "))
-> ("H" "e" "l" "l" "o" " " "W" "o" "r" "l" "d" "!" " ")
```
Now let's rotate the ``*Str`` list and check it:
```
: (rot *Str)
-> (" " "H" "e" "l" "l" "o" " " "W" "o" "r" "l" "d" "!")
: *Str
-> (" " "H" "e" "l" "l" "o" " " "W" "o" "r" "l" "d" "!")
```
As you can see, the trailing space has moved to the beginning of the string. Our string length is 13 characters, so if we execute ``rot *Str`` 12 times, we can move it back. We can control the number of executions with the ``do`` function:.
```
: (do 12 (rot *Str))
-> ("H" "e" "l" "l" "o" " " "W" "o" "r" "l" "d" "!" " ")
```
------------------------
### Creating the animation
Now we're almost done. We only need to transform our list ``*Str`` back to a string using ``pack``.
```
(gui '(+View +TextField) '(pack (rot *Str))))
```
It works! If we click on the button, we see a (very primitive) animation.

------------------------
### Creating the reverse button
According to the task description, we should implement a button to reverse the rotation direction. As we saw before, we can control that by rotating 12 times instead of one. So the easiest way to do that is to define a global variable ``*Dir`` that can be either 1 or 12. Let's initialize it to ``1`` using the ``one`` function:
```
(one *Dir)
```
and modify our ``+TextField`` so that the rotation is controlled by a ``do`` loop which depends on ``*Dir``:
```
(gui '(+View +TextField) '(pack (do *Dir (rot *Str))))
```
Finally, we also need to define a button that toggles between ``1`` and ``12``.
```
(gui '(+Button) "Reverse direction" '(setq *Dir (if (= 1 *Dir) 12 1)))
```
Finally, we could even toggle the button label depending on the current value of ``*Dir``.
```
(gui '(+Button) '(if (= 1 *Dir) "Rotate left" "Rotate right")
'(setq *Dir (if (= 1 *Dir) 12 1)) )
```
Now it looks like this:

---------------------
### Let's give it some styling!
Finished, but let's make it at least a little bit more pretty!
1. First, I always like to include the bootstrap classes to make positioning and alignment a little bit easier.
2. Secondly, we learned that the "create animation" button clicks itself automatically. So why did we still have to click it? As you could see, the first thing that happened after clicking was the session start, which includes a port change. This is blocked if done automatically via JavaScript due to the **cross-origin-policy** of the browser.
So if the session would be already running, the button would click itself automatically and we wouldn't need to show it. So let's do two things:
1. **insert an auto-session start** by replacing ``(app)`` with ``((and (app) *Port% (redirect (baseHRef) *SesId *Url))``.
2. **Hide hide the "start animation" button using the bootstrap "invisible" class**(which simply sets the CSS "visibility" property to "hidden"). Also, let's replace our "rotate left" and "rotate right" by icons.
3. Last step, let's add some fancy flickering and neon design for fun (credits to the sources below)!
And that's it:

You can download the final solution from [this link](https://gitlab.com/picolisp-blog/web-applications/-/tree/main/rosetta-code/animation.l). In the same folder you will also find the custom CSS file with the neon animation.
---------------------
# Sources
https://rosettacode.org/wiki/Animation
Icons made by ZAK from www.flaticon.com
https://css-tricks.com/how-to-create-neon-text-with-css/
https://codepen.io/WebTutorials/pen/GRoqZVo